

How to Set Up a Low-Cost Hardware Hacking Lab for Students
- BugFox Security
- Jul 6
- 3 min read

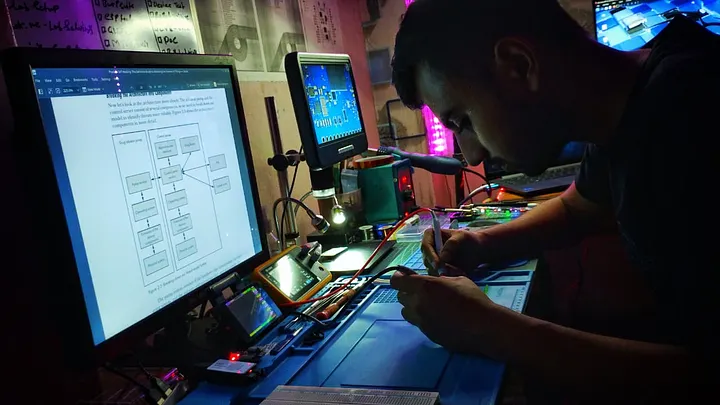
Building a hardware hacking lab can seem expensive and complicated, especially for students working with limited budgets. Yet, hands-on experience with hardware is crucial for understanding embedded systems, IoT devices, and cybersecurity. This guide shows how to create a practical, low-cost hardware hacking lab that fits a student’s budget without sacrificing learning opportunities.
Why Build a Hardware Hacking Lab?
Hardware hacking labs provide a controlled environment to explore, test, and learn about electronic devices. They help students:
Understand how hardware and software interact
Develop skills in reverse engineering and security testing
Experiment with real-world devices safely
Prepare for careers in cybersecurity, embedded systems, and electronics
A well-equipped lab does not require expensive tools. With careful selection, students can build a functional setup for under $200.
Essential Tools and Equipment
Start with the basics. These tools cover most hardware hacking tasks and are affordable:
Multimeter
Measures voltage, current, and resistance. A digital multimeter with auto-ranging is ideal and costs around $15-$30.
Soldering Kit
Includes a soldering iron, solder wire, and a stand. Essential for modifying circuits and repairing devices. Basic kits are available for $20-$40.
Logic Analyzer
Captures and analyzes digital signals. A low-cost USB logic analyzer can be found for $10-$25 and connects to a PC.
USB to Serial Adapter
Allows communication with microcontrollers and embedded devices via serial ports. These adapters cost about $5-$15.
Breadboard and Jumper Wires
For prototyping circuits without soldering. A breadboard with a set of jumper wires costs around $10.
Microcontroller Development Boards
Boards like Arduino Uno or ESP32 are affordable ($5-$15) and great for learning embedded programming and hardware hacking.
Basic Hand Tools
Small screwdrivers, tweezers, wire cutters, and pliers are necessary for device disassembly and circuit work. A set can be purchased for $10-$20.
Setting Up Your Workspace
A clean, organized workspace improves efficiency and safety. Consider these tips:
Use a sturdy table with good lighting.
Have a static-free mat or surface to protect sensitive components.
Organize tools in containers or toolboxes for easy access.
Keep a notebook or digital log for documenting experiments and findings.
Learning Resources and Software
Hardware hacking requires both practical skills and theoretical knowledge. Use free or low-cost resources:
Datasheets and Manuals
Manufacturers often provide datasheets online. These documents explain pinouts, electrical characteristics, and protocols.
Open-Source Software
Tools like Arduino IDE, PuTTY (serial communication), and Sigrok (logic analyzer software) are free and widely used.
Online Tutorials and Communities
Websites like Hackaday, Instructables, and forums such as Reddit’s r/hardwarehacking offer project ideas and troubleshooting help.
Practical Projects to Start With
Hands-on projects help solidify learning. Here are some beginner-friendly ideas:
Serial Communication with a Microcontroller
Use a USB to serial adapter to send and receive data from an Arduino board.
Signal Analysis with a Logic Analyzer
Capture signals from a simple digital circuit and analyze timing and protocols.
Device Teardown and Reverse Engineering
Disassemble a broken electronic device to identify components and trace circuits.
Building a Simple Sensor Circuit
Connect sensors like temperature or light sensors to a microcontroller and read data.
These projects require minimal components and reinforce fundamental concepts.
Safety Considerations
Working with electronics involves risks. Follow these safety tips:
Always unplug devices before opening or soldering.
Use eye protection when soldering.
Avoid working on high-voltage equipment without proper training.
Keep liquids away from electronic components.
Budget Breakdown Example
Here is an example budget for a basic hardware hacking lab:
| Item | Estimated Cost (USD) |
|---------------------------|---------------------|
| Digital Multimeter | $20 |
| Soldering Kit | $30 |
| USB Logic Analyzer | $15 |
| USB to Serial Adapter | $10 |
| Breadboard and Jumper Wires| $10 |
| Arduino Uno Board | $15 |
| Hand Tools Set | $15 |
| Total | $115 |
This leaves room to add components like sensors, cables, or additional microcontrollers as needed.
Tips for Expanding Your Lab Over Time
As skills grow, consider adding:
Oscilloscope (used or entry-level models start around $100)
More advanced microcontrollers or FPGA boards
Specialized tools like chip programmers or JTAG debuggers
Component kits with resistors, capacitors, and ICs
Focus on tools that match your learning goals and projects.


Comments